


Photo by Venti Views on Unsplash
Walk-through: AWS CloudFront signed URLs & custom domains to securely serve AWS S3 contents


Table of contents
Contributors:
Ajith Joseph, Manager, Deloitte;
Noel Arzadon, Specialist Master, Deloitte;
Introduction
Most organizations that distribute content over the internet want to restrict access to the documents, data and content in their Amazon S3 buckets. While Amazon S3 provides REST APIs and associated IAM roles/policies provide easy access to the files and documents within the bucket, sometimes there is a need to distribute these objects within the AWS S3 bucket without exposing the S3 bucket names that are embedded in the direct access URLs.
For example, AWS S3 Pre-signed URLs are great when it comes to distributing content with temporary access to specific documents. One of the most common use cases for S3 pre-signing is distributing documents like correspondence or decisions to the customers where they will receive an email with a link to specific documents which can be viewed and downloaded via a web browser. However, a drawback of this approach is that the S3 bucket name will be visible to the customer since S3 pre-signing process utilizes the same direct S3 REST APIs to generate temporary access to the objects within the bucket.
The below figure shows an example of an S3 pre-signed URL with temporary access to a document. This method will expose the bucket name where it is stored.
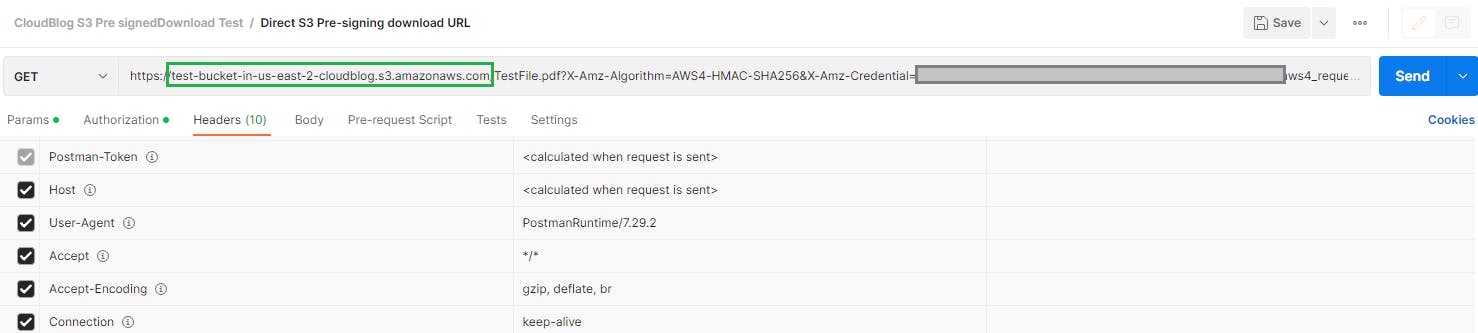
This could be a deal breaker for organizations that have stringent security rules. While there are many ways to overcome such situations, utilizing a Amazon CloudFront distribution to distribute S3 content could be a possible solution that can be implemented swiftly while adhering to all security needs.
Amazon CloudFront for signing and custom domain names
AWS CloudFront being one of the most popular CDN services is a great way to distribute content from S3 buckets, also there are additional features that one can take advantage of such as caching, edge processing, geographic restrictions etc. The idea of restricting the users to access S3 private content by requiring viewers to use CloudFront signed URLs and ensuring that the bucket can be accessed only via CloudFront Origin Access Control (OAC) can greatly enhance the security posture of any organization.
The below figure Illustrates how OAC and bucket policies can prevent access to S3 buckets using direct URLs. (Ideally, WAF can also be utilized to enhance CloudFront origin security but since this blog is a beginner's guide to CloudFront signed URLs, we won't be deploying WAF).

Objectives:
In this walk-through, you will see examples of using AWS CloudFront for:
Signed URLs to restrict access to S3 content and mask S3 bucket name in the URL
Sample Python code to generate signed URLs
Testing of signed URLs to download/view a test document from S3
Walk-through Steps:
Pre-requisites:
Understanding of OpenSSL, IaC such as CloudFormation, CloudFront Distribution & DNS
Basic python programming
Step 1:Create the key pair to be associated with the CloudFront signers
The signer will use the private key to sign the URL and the CloudFront utilizes the public key to verify the signature. In this blog(Step 4) we will explain how to use a simple Python module to sign the URLs using private keys and generate signed URLs that are valid for a specified expiry time. First, let's create the key pairs required.
Note: The key pair must be SSH-2 RSA, base64 encoded PEM format and 2048 bit.
Using the OpenSSL, we can generate an RSA key pair of 2048 bits and save it as private_key.pem
openssl genrsa -out private_key.pem 2048
Now extract the public key out of the private key using the following command
openssl rsa -pubout -in private_key.pem -out public_key.pem
Step 2:Provisioning CloudFront distribution and adjust S3 bucket permissions
Below is a code snippet to create Origin Access Control via Cloudfromation to securely access the S3 content
  CloudblogCloudFrontOAC:
    Type: AWS::CloudFront::OriginAccessControl
    Properties:
      OriginAccessControlConfig:
        Description: Origin access control for signed urls to S3
        Name: CBOAC-S3
        OriginAccessControlOriginType: s3
        SigningBehavior: always
        SigningProtocol: sigv4
After the OAC is created, associate it with a CloudFront Distribution and also if available we will highly recommend using a custom domain name and associating it with the distribution. (This blog doesn't have steps on how a domain can be created, I have used a popular domain service provider to create the domain used in this blog)
  DSCloudFrontDistribution:
    Type: AWS::CloudFront::Distribution
    Properties:
      DistributionConfig:
        WebACLId: "arn:aws:wafv2:us-east-1:XXXXXXXXXXX:global/webacl/CB-WebACL-ForBlog/"
        Aliases:
          - cftest.cloudblog.ajosephlive.com
        ViewerCertificate:
          AcmCertificateArn: "arn:aws:acm:us-east-1:XXXXXXXXXXXXX:certificate/XXXXXXXXXXXXX"
          MinimumProtocolVersion: TLSv1.2_2021
          SslSupportMethod: sni-only
        Origins:
          - Id: CBS3Origin
            DomainName: "    test-bucket-in-us-east-2-cloudblog.s3.us-east-2.amazonaws.com"
            OriginAccessControlId: !Ref CloudblogCloudFrontOAC
            S3OriginConfig:
              OriginAccessIdentity: ""

        Enabled: 'true'
        Comment: S3 CloudFront
        DefaultCacheBehavior:
          TargetOriginId: CBS3Origin
          AllowedMethods:
            - GET
            - HEAD
            - OPTIONS
            - PATCH
          ViewerProtocolPolicy: redirect-to-https
          CachePolicyId: !Ref CBCloudFrontCachePolicy

        IPV6Enabled: false
        CacheBehaviors:
          - AllowedMethods:
              - GET
              - HEAD
            TargetOriginId: DSS3Origin
            PathPattern: /media/*
            ViewerProtocolPolicy: redirect-to-https
            CachePolicyId: !Ref CBCloudFrontCachePolicy

        CustomErrorResponses:
          - ErrorCode: '404'
            ResponsePagePath: "/error-pages/404.html"
            ResponseCode: '200'
            ErrorCachingMinTTL: '30'
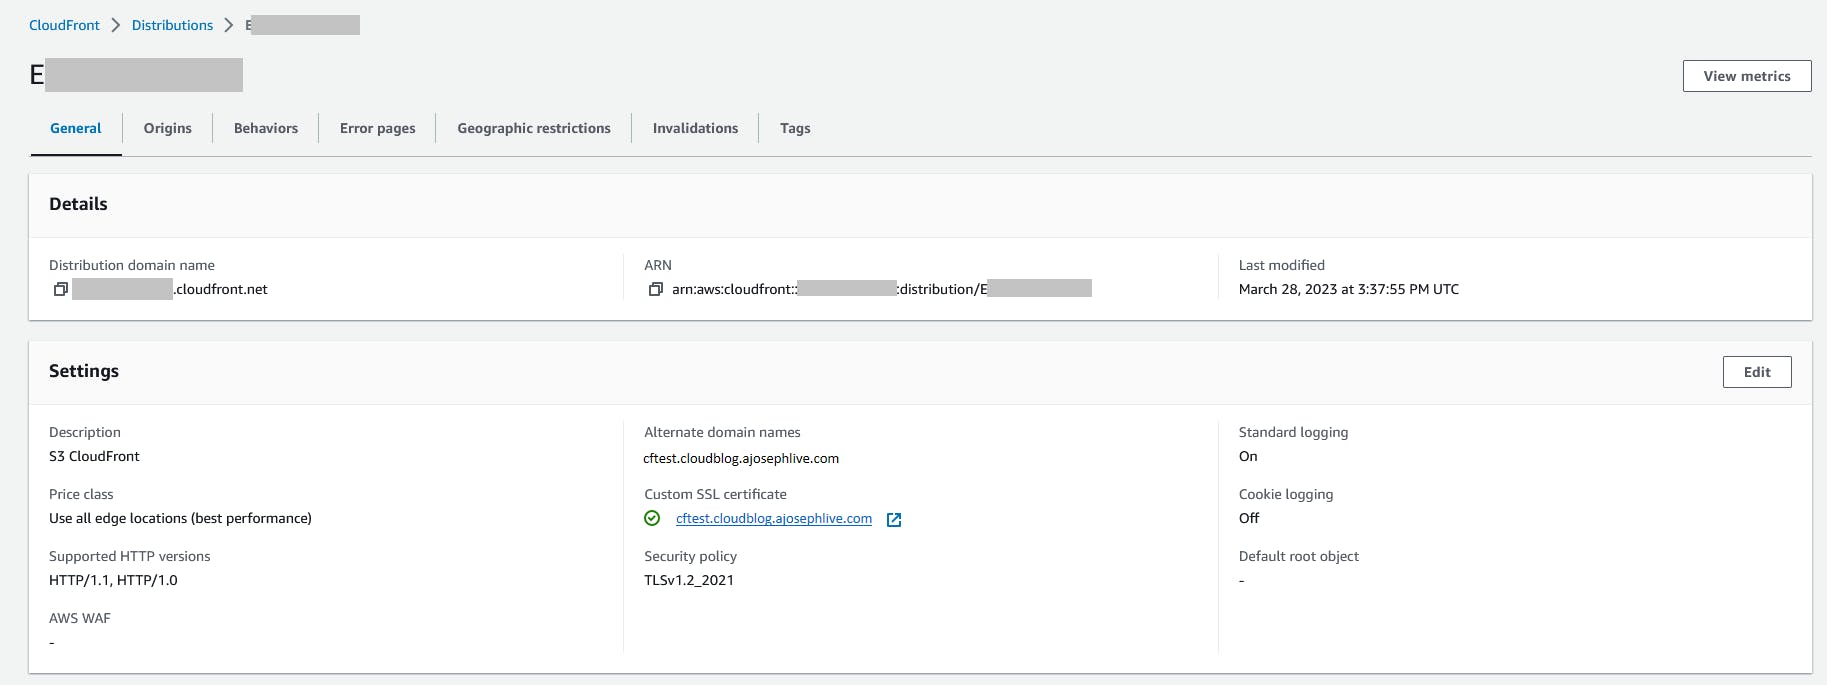
You should see the CloudFront distribution deployed similar to the below figure.
Update the bucket permission to allow access only from CloudFront using OAC. A sample JSON policy is below:
{
    "Version": "2012-10-17",
    "Statement": {
        "Sid": "AllowCloudFrontServicePrincipalReadOnly",
        "Effect": "Allow",
        "Principal": {
            "Service": "cloudfront.amazonaws.com"
        },
        "Action": "s3:GetObject",
        "Resource": "arn:aws:s3:::test-bucket-in-us-east-2-cloudblog/*",
        "Condition": {
            "StringEquals": {
                "AWS:SourceArn": "arn:aws:cloudfront::<AWS account ID>:distribution/<CloudFront distribution ID>"
            }
        }
    }
}
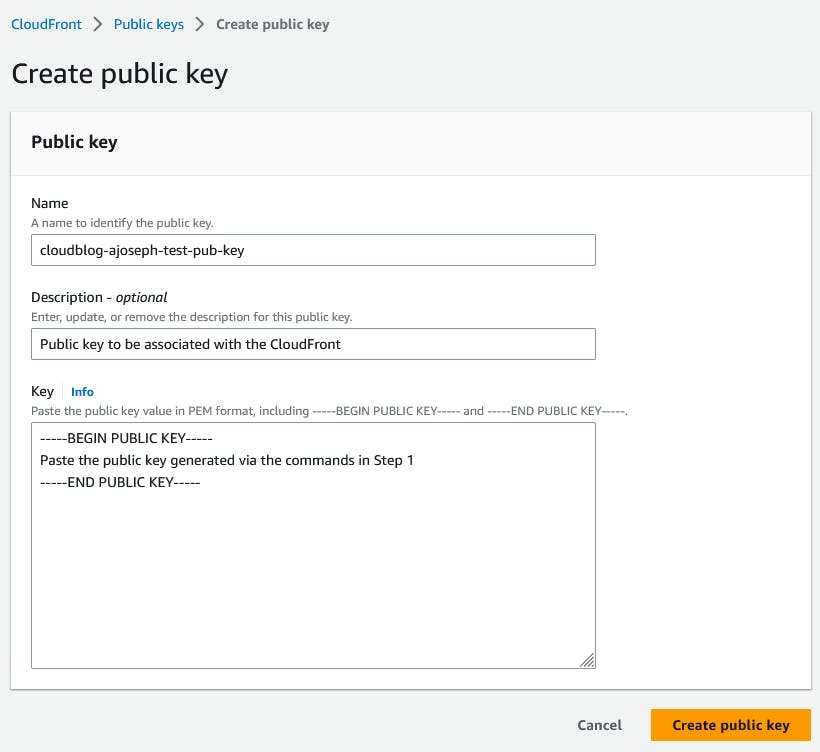
Step 3: Uploading public key to CloudFront
Now upload the public key that was created in Step 1 to CloudFront public keys. Also, create a key group for this public key.
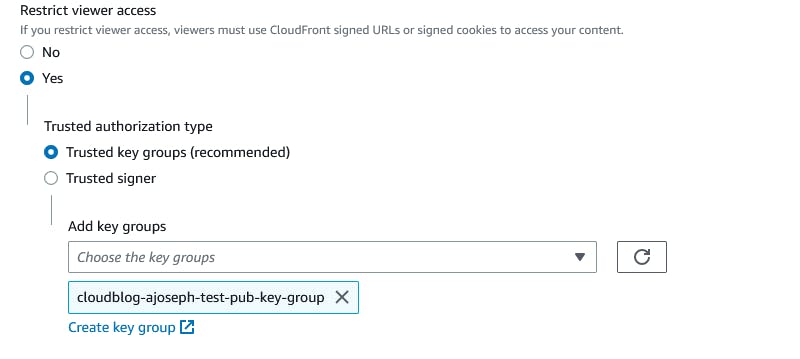
Associate the distribution created to use this key group and most importantly restrict viewer access to use signed URLs. This will ensure that CloudFront origin is only accessible via signed URLs.
Below updates to the CloudFormation template for the TrustedKeyGroups parameter should do the trick.
        CacheBehaviors:
          - AllowedMethods:
              - GET
              - HEAD
            TargetOriginId: DSS3Origin
            TrustedKeyGroups:
              - cloudblog-ajoseph-test-pub-key-group
Verifying the update via the CloudFront console should look like this:
Step 4: Code for generating signed URLs
For testing the CloudFront signing process, we created a lambda function written in Python which utilizes the private key generated in Step 1 and produces a Signed URL.
Note: Since we are importing modules from RSA in the below code snippet, we had to deploy a Lambda Layer with the rsa package.
from botocore.signers import CloudFrontSigner
import rsa
import base64
import json
import os
import boto3
from datetime import datetime, timedelta

ssm_client = boto3.client('ssm')

#In this example we are using parameter store to store the key pair values; for better secuirty pls store them in Secrets Manager or similar.
public_key_id = ssm_client.get_parameter(Name="/cloudblog/ajoseph/signed-url/public-key-id",WithDecryption=True)
private_key_data_dict = ssm_client.get_parameter(Name="/cloudblog/ajoseph/signed-url/private-key",WithDecryption=True)
private_key_data=private_key_data_dict['Parameter']['Value']

def rsa_signer(message):
    private_key = private_key_data
    return rsa.sign(
        message,
        rsa.PrivateKey.load_pkcs1(private_key.encode('utf8')),'SHA-1')

def lambda_handler(event, context):
    try:
        query_string=event['queryStringParameters']["filename"]
    except:
        query_string=None
    key_id = public_key_id
    url = "https://cftest.cloudblog.ajosephlive.com/"+query_string
    cf_signer = CloudFrontSigner(key_id , rsa_signer)
    expire_date = datetime.utcnow() + timedelta(hours=1) # expires in 1 hour
    # Signing with a canned policy::
    signed_url = cf_signer.generate_presigned_url(url, date_less_than=expire_date)

    return {
       'statusCode': 200,
       'body': signed_url
    }
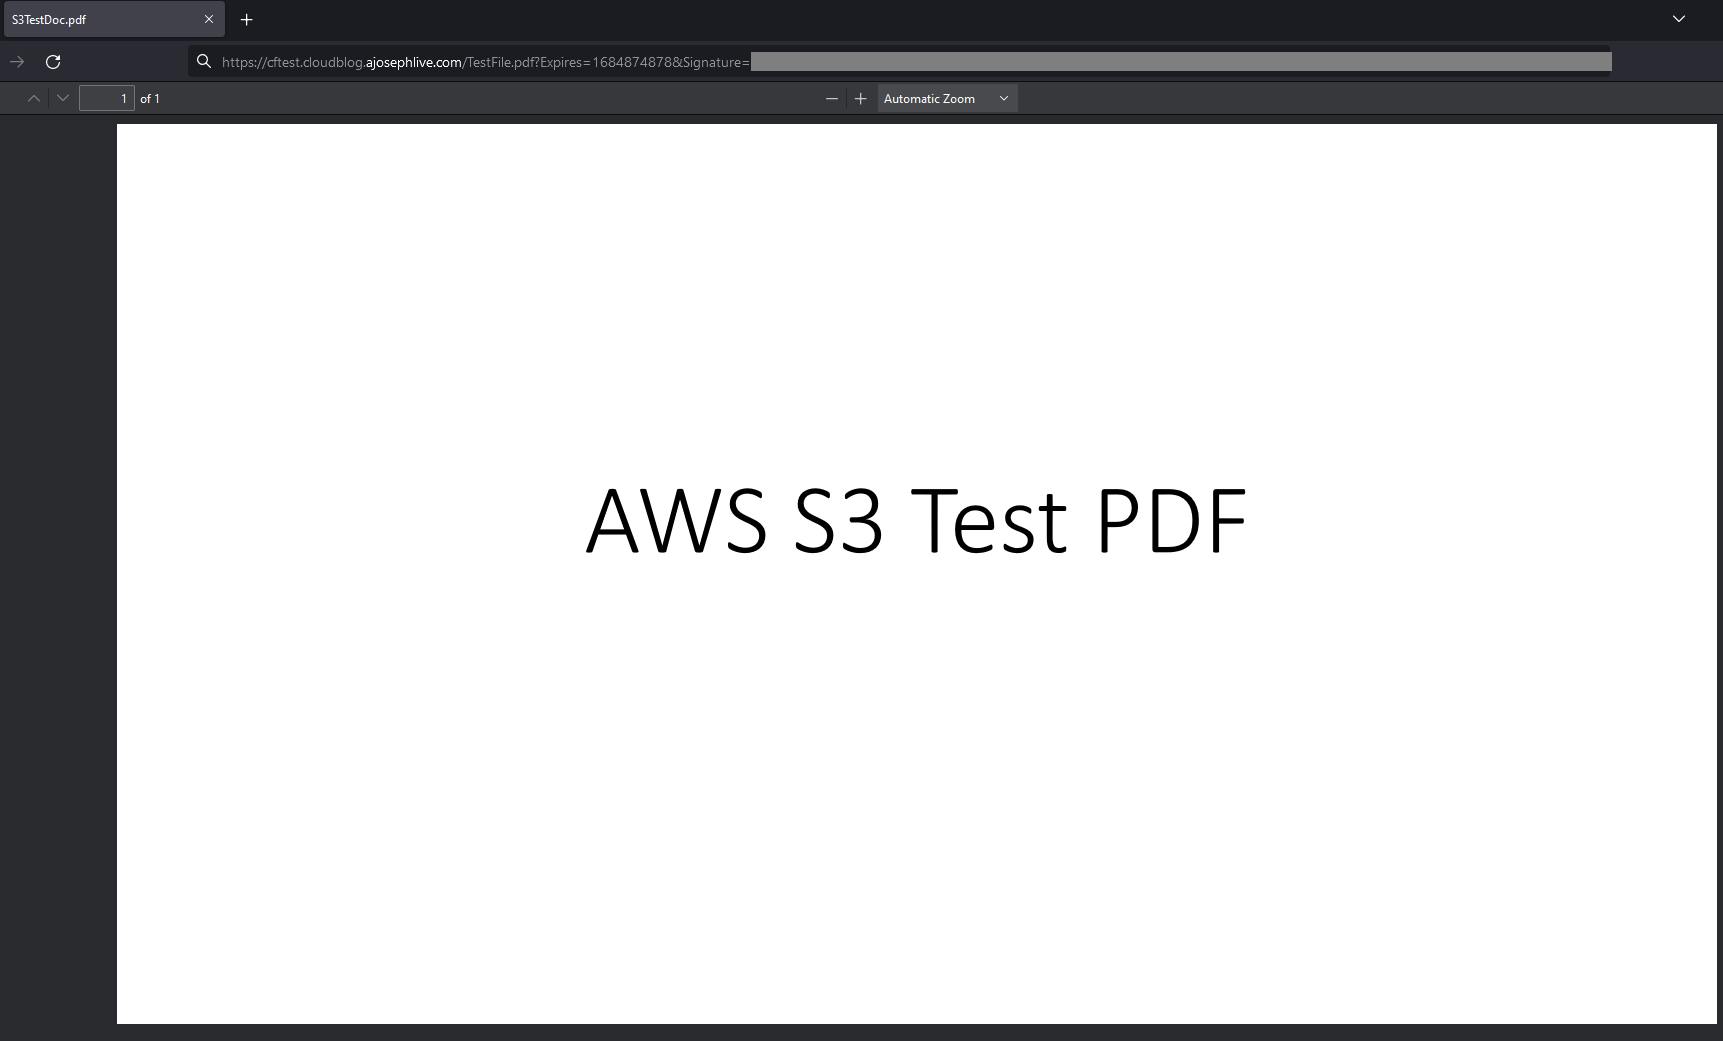
Step 5: Testing the signed URLs
Executing the Python code from above provides a CloudFront signed URL that has temporary access to the file TestFile.pdf stored in test-bucket-in-us-east-2-cloudblog. From the below screen print, it is evident that the bucket name is no longer visible in the signed URL.

This signed URL can now be used in any web browser to download/view the file until the expiry time.
Conclusion
In this brief walk-through, we have learned that configuring CloudFront Signed URLs to require user access files in AWS S3 is a great way of enhancing security, masking bucket names and controlling access to contents stored in AWS. We followed a very simple example and did not attempt to build a production-grade architecture. Utilize the basic concepts of Signed URLs taught here along with KMS keys for encryption, AWS WAF for inspection, custom headers validation, and lambda@edge functions to create a robust architecture to distribute Amazon S3 contents.